Access Employee Personal
Use the Personal tab to maintain basic employee and emergency contact information. Include any Organization the employee is affiliated with as well as upload an employee photo.
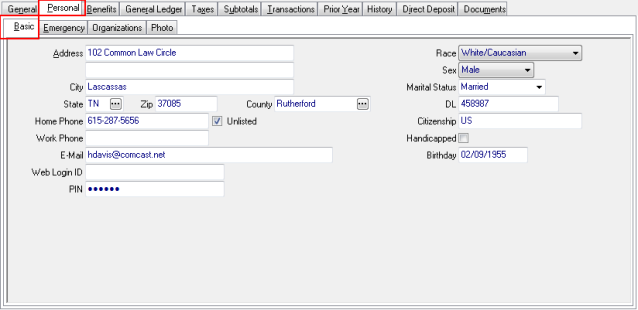
Enter the employees home street Address.
Enter the Zip Code first and City and State will populate automatically.
Provide the City if not populated by Zip code.
Provide the State if not populated by Zip code.
County populates automatically when Zip Code is entered. Search to select an alternate County.
Enter a Home Phone number and choose Unlisted if the Home Phone is unlisted.
Enter a Work Phone number. See the Phone Directory report to create a list of all employees.
Enter any valid Email address for the employee.
If a web page is available to employees to view HR and payroll information, create an initial Web Login ID for the employee.
PIN- The PIN for the employee.
Select the Race of the employee from the drop down menu.
- White, not Hispanic or Latino
- Black or African American, not Hispanic or Latino
- Asian, not Hispanic or Latino
- Native Hawaiian or other Pacific Islander, not Hispanic or Latino
- Hispanic
- American Indian or Alaska Native, not Hispanic or Latino
- Two or more races, not Hispanic or Latino
- Race Unknown
Choose a Sex of Male, Female or Unknown.
Select a Marital Status from the drop down menu.
|
|
|
|
|
DL indicates Driver's License, enter the employees Driver's License number if applicable.
Enter the country of the employee Citizenship.
Click the Handicapped checkbox if applicable.
Enter the Employee's Birthday.
Time Card is an active field if using Chronologer, enter the Time Card ID for the employee.
View Hours Worked in Chronologer is an active field if using Chronologer, select if an employee can view their hours worked through Chronologer.
Default Time Clock ID is an active field if using Chronologer, enter the default Time Clock ID for the employee.
The Home Address Phone report is available for one or a range of employees.
Emergency Contact Information
Two Emergency Contacts are available for an Employee. Use the Emergency Contacts printed report for one or a range of employees.
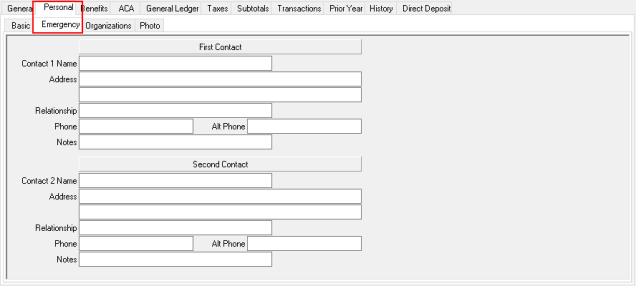
Enter the First Emergency Contact Name in the Contact 1 Name field.
Two fields are available to enter the Address for the Emergency Contact in this 40 character alpha-numeric field.
Define the Relationship between the Emergency Contact person and the employee.
Phone- Enter a valid phone number for the Emergency Contact person.
Alt Phone- Enter an alternate phone number such as a cell phone number.
Any Notes or additional information needed can be entered in this 30 character alpha-numeric field.
Enter the Second Emergency Contact Name in the Contact 2 Name field.
Two fields are available to enter the Address for the Emergency Contact in this 40 character alpha-numeric field.
Define the Relationship between the Emergency Contact person and the employee.
Enter a valid Phone number for the Emergency Contact person.
Enter an Alt Phone, alternate phone number, such as a cell phone number.
Any Notes or additional information needed can be entered in this 30 character alpha-numeric field.
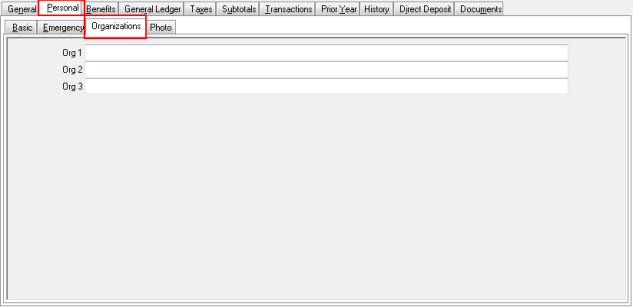
Organizations
Enter the name of up to three Organizations the employee may be a member.
Photo
Select a jpeg or bitmap file to attach a photo of the employee to the payroll account.
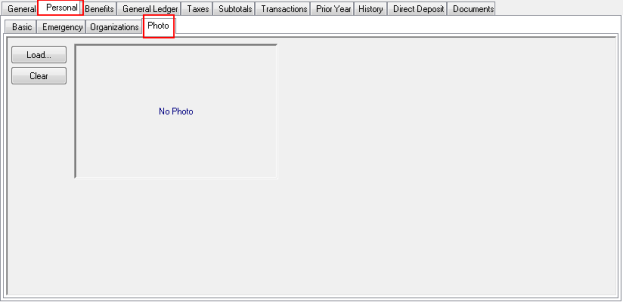
Select Load and navigate to the location Photos are stored.
Click Clear to remove the current photo.